W-1: a water rocket that flies our flight computer first.
Two 2 litre fizzy-drink bottles, base to base. The lower one holds water and air pumped in by hand; when the launcher lets go, the air pushes the water out of the neck and the rocket goes up. Nothing burns. The upper bottle carries the same flight computer as N-1, a parachute and a wind-up timer that opens the parachute hatch. Plywood parts are cut on the Sculpfun S9 Pro.
Every bottle size in this book is a placeholder until you measure your bottles, and every mass is an estimate until you weigh the parts.
Change the numbers in w1/design.py, run it, and this book updates.
Why W-1 exists
The idea started with a question about hydrogen rockets made by electrolysis. That's off the table: hydrogen and oxygen together are explosive, and home-made engines aren't something NOVTAR builds. A water rocket gives most of the fun with none of that. It's pushed by compressed air and water, there's no fuel, and the only energy is what you pump in.
It also has a real job. N-1's flight computer has never flown. W-1 lets it fly, log, radio its data down and get found again, many times and cheaply, before N-1 goes up on a real motor. Every W-1 flight is a test of the board, the sled, the battery, Mission Control and our launch-day routine.
The rules for W-1. Nothing burns. No chemicals, no hydrogen, no CO2 cartridges, no compressor: only a hand or foot pump with a gauge. The pressure bottle is an undamaged fizzy-drink bottle and is never heated, cut, glued, scored or drilled. No glass, metal or still-water bottles. Pressurise only from a distance, release with a pull cord, everyone behind the line, an adult present, in a big open field. The flight computer only measures. The parachute is opened by a mechanical timer, not by the computer.
Design summary
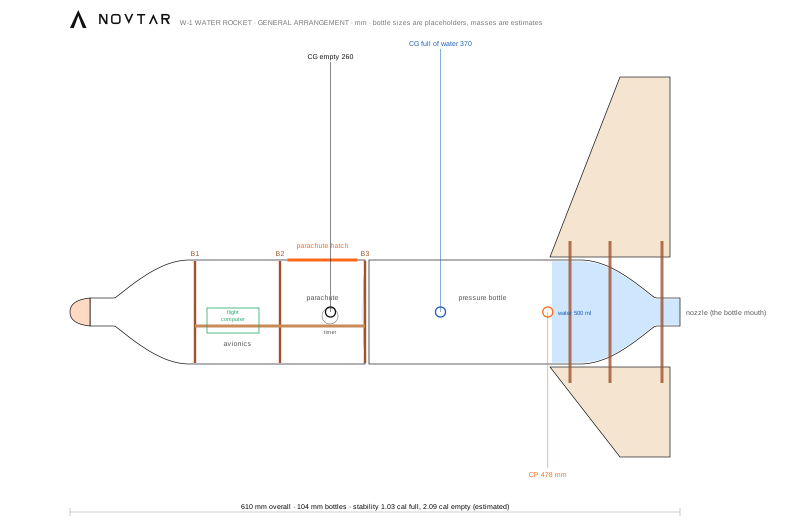
Stability, full and empty
Stability is how far the centre of pressure (CP) sits behind the centre of gravity (CG), in bottle diameters (calibres). It's worked out the same way as N-1 (Barrowman), with one extra term: the pressure bottle's shoulder narrows towards the tail, and that takes away stability (-1.855 against the nose's +2.0). That is why W-1 has 4 large fins (120 mm root, 180 mm span) and 220 g of modelling clay in the nose.
- Empty: 2.09 calibres (CG 260 mm from the tip, CP 478 mm). This is the rocket after the water has gone, which is almost the whole flight.
- Full: 1.03 calibres (CG 370 mm). The water sits at the tail, so the CG is far back at lift-off. As the water leaves, the CG moves forward and the rocket becomes more stable. For a typical 2 litre water rocket the water is gone in under a tenth of a second[1], so the full figure only applies for the first moment off the launcher. Rev B brought it up to about 1 calibre with bigger fins (180 mm span), more clay in the nose and a quarter fill instead of a third. That is the minimum, not a comfortable margin, so: launch straight up, on calm days, and confirm with the swing test before the first flight.
- Never fill more than a quarter: more water moves the CG back and the full figure drops below 1 calibre.
- The bottle sizes are placeholders and Barrowman's method assumes a smooth body, which two bottles and a fin can are not. Treat these as estimates and trust the swing test (section 09).
Where the mass is
| Part | Mass | Centre (from the tip) | |
|---|---|---|---|
| Foam nose tip | 8 g | 10 mm | estimate |
| Payload bottle (base cut off) | 38 g | 171 mm | estimate |
| Nose ballast (modelling clay) | 220 g | 55 mm | our choice |
| Flight computer: Heltec V3, sensors, LiPo, switch, buzzer | 55 g | 168 mm | estimate |
| Plywood spine (sled) | 24.8 g | 210 mm | estimate |
| Plywood bulkheads B1, B2, B3 | 41.4 g | 210 mm | estimate |
| Parachute, lines, swivel, shock cord | 30 g | 252 mm | estimate |
| Wind-up timer | 15 g | 252 mm | estimate |
| Sleeve band and tape at the joint | 15 g | 315 mm | estimate |
| Pressure bottle (empty) | 48 g | 437 mm | estimate |
| Fins x4 (plywood) | 118.7 g | 555 mm | estimate |
| Fin can rings x3 (plywood) | 47.8 g | 546 mm | estimate |
| Fin can foam liner and tape | 6 g | 510 mm | estimate |
| Water, 500 ml (a quarter of the bottle) | 500 g | 517 mm | modelled |
The water's position comes from a simple model of the upside-down bottle (neck, straight shoulder, body). The model holds 1906 ml against the label's 2000 ml, so the placeholders are close but not exact.
How high?
Not estimated. We didn't find a method we could cite and check, and the sources we found disagree by a long way: one Scouts risk assessment says rockets with a 50 psi limit "should not reach over 10 meters"[2], while NASA Glenn's table of "typical classroom maximums" lists 51 m at 40 psi without saying what was measured[3]. The flight computer will measure it, which is the point.
How W-1 is put together
| Part | Where (from the tip) | What it is |
|---|---|---|
| Soft nose tip | 0 to 20 mm | Foam (pipe insulation or a pool-noodle offcut) taped over the cap. The nose is the payload bottle's own neck and shoulder, with the clay ballast pressed into the neck. |
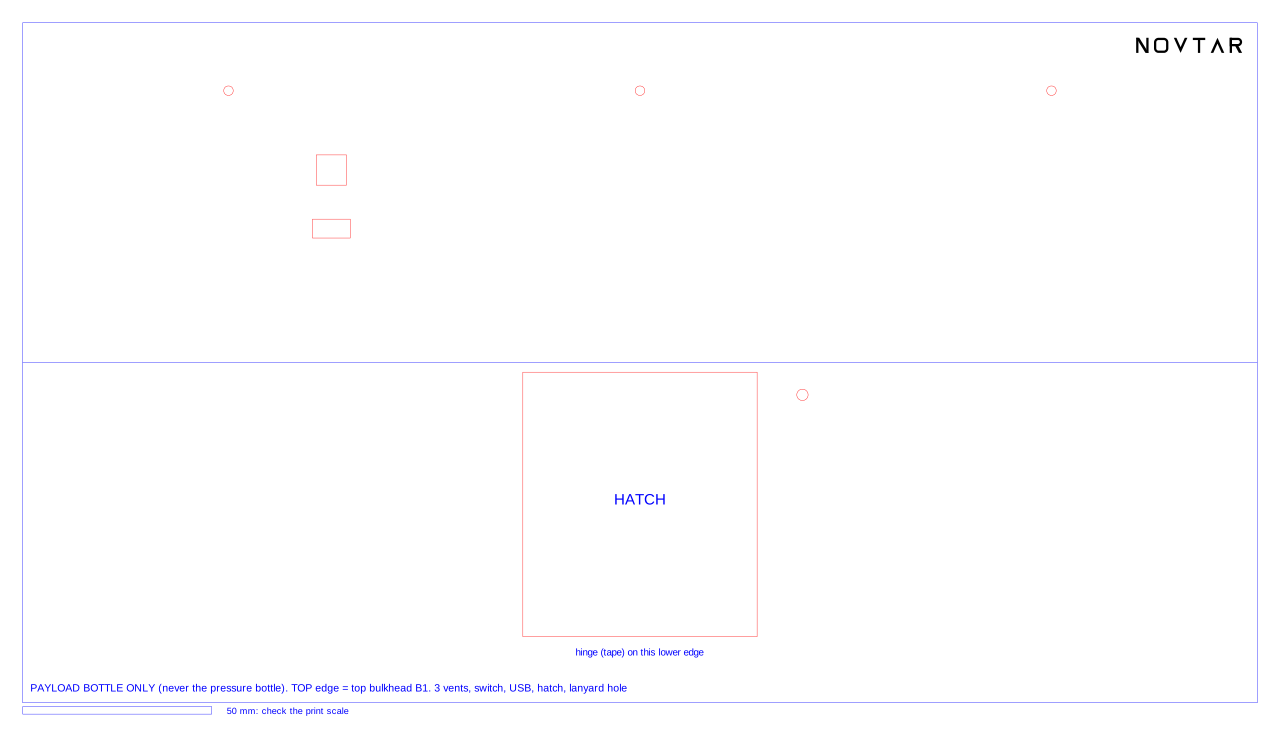
| Avionics bay | B1 125 to B2 210 mm | The flight computer on the spine: Heltec V3, BMP280, MPU6050, LiPo, buzzer and switch, wired exactly as N-1. Three 2.5 mm vents, a switch hole and a USB hole in the bottle wall. |
| Parachute bay | B2 210 to B3 295 mm | The parachute behind a 70 mm side hatch cut in the payload bottle, the wind-up timer on the back of the spine, and the shock cord tied to B3. |
| Joint | 295 mm | The payload bottle's cut edge meets the pressure bottle's base. B3 sits flush with the cut edge, the pressure bottle's feet push on it, and a sleeve band plus tape holds the two together. No glue on the pressure bottle. |
| Pressure bottle | 295 to 610 mm | An undamaged 2 litre fizzy-drink bottle, upside down, a quarter full of water. Its mouth is the nozzle. Retire it after 10 launches[4]. |
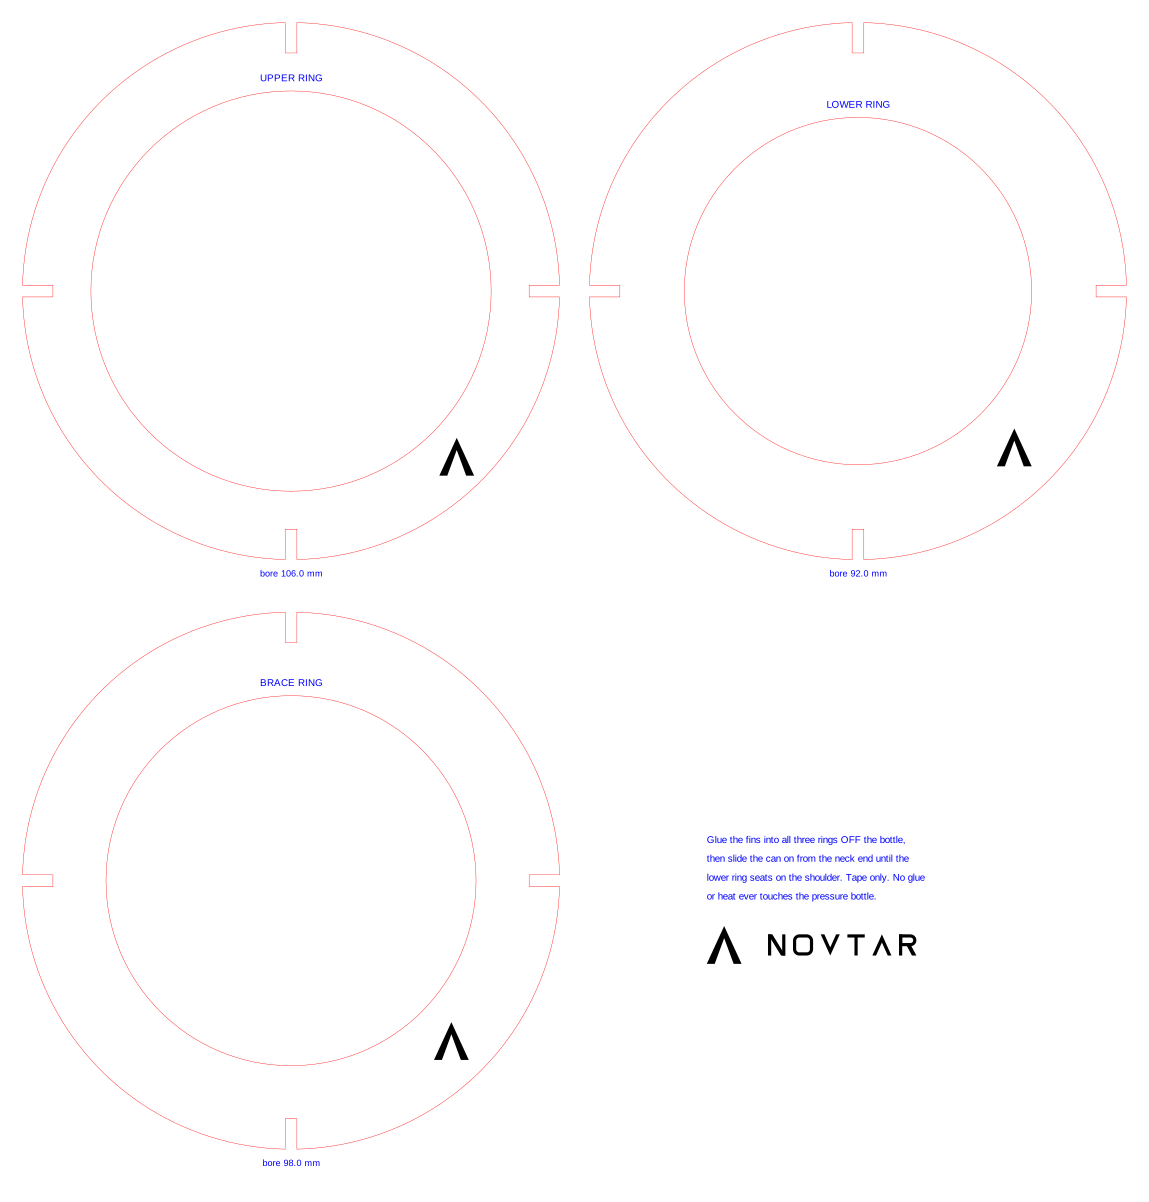
| Fin can | 480 to 600 mm | 4 plywood fins glued into three plywood rings (ply to ply only). The lower ring's bore is smaller than the bottle, so the can slides on from the neck end and seats on the shoulder: drag and lift-off push it harder onto that seat. Foam tape lines the rings and tape holds it on. |
Why it's built this way
- Nothing is attached to the pressure bottle with glue or heat. The fin can is held by the shoulder's shape plus tape; the payload is held by the base pushing on B3 plus a taped sleeve. The bottle is exactly as it came from the shop.
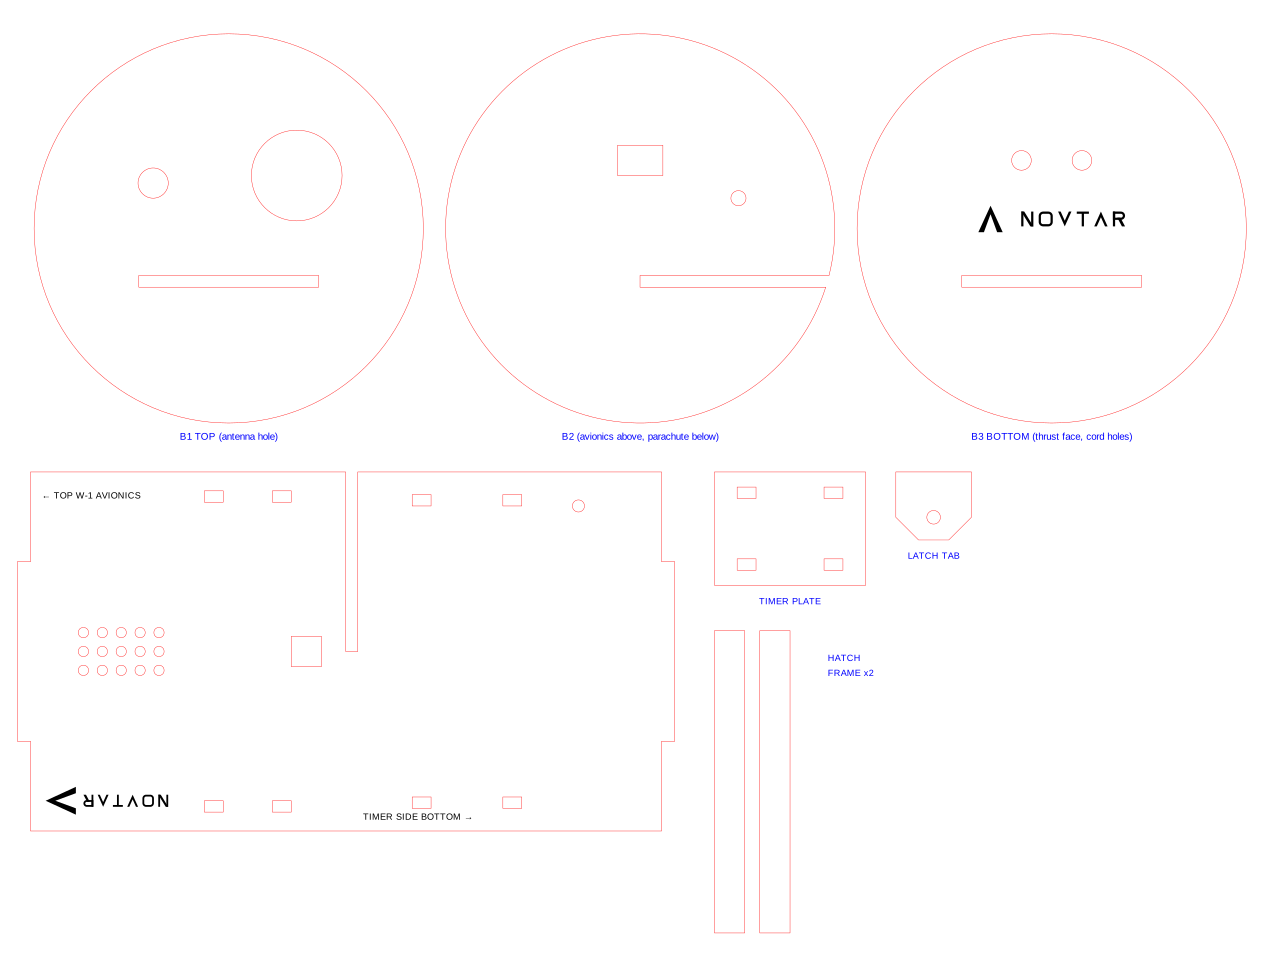
- The payload core is one unit (B1, B2, B3 and the spine) that slides into the payload bottle from its cut end. The shoulder stops it at the top and the pressure bottle closes it in at the bottom. Untape the joint and it slides out.
- The flight computer sits high, close to the nose, where its weight helps stability, well away from the water.
What to buy
No prices are given: check them when you buy. Part descriptions are generic on purpose.
| Item | Qty | Notes |
|---|---|---|
| 2 litre fizzy-drink bottles, same brand and shape | 4 or more | Fizzy (carbonated) only, never still water. Undamaged: no dents, cracks or scratches. Two for the rocket, the rest are spares, because pressure bottles retire after 10 launches[4]. |
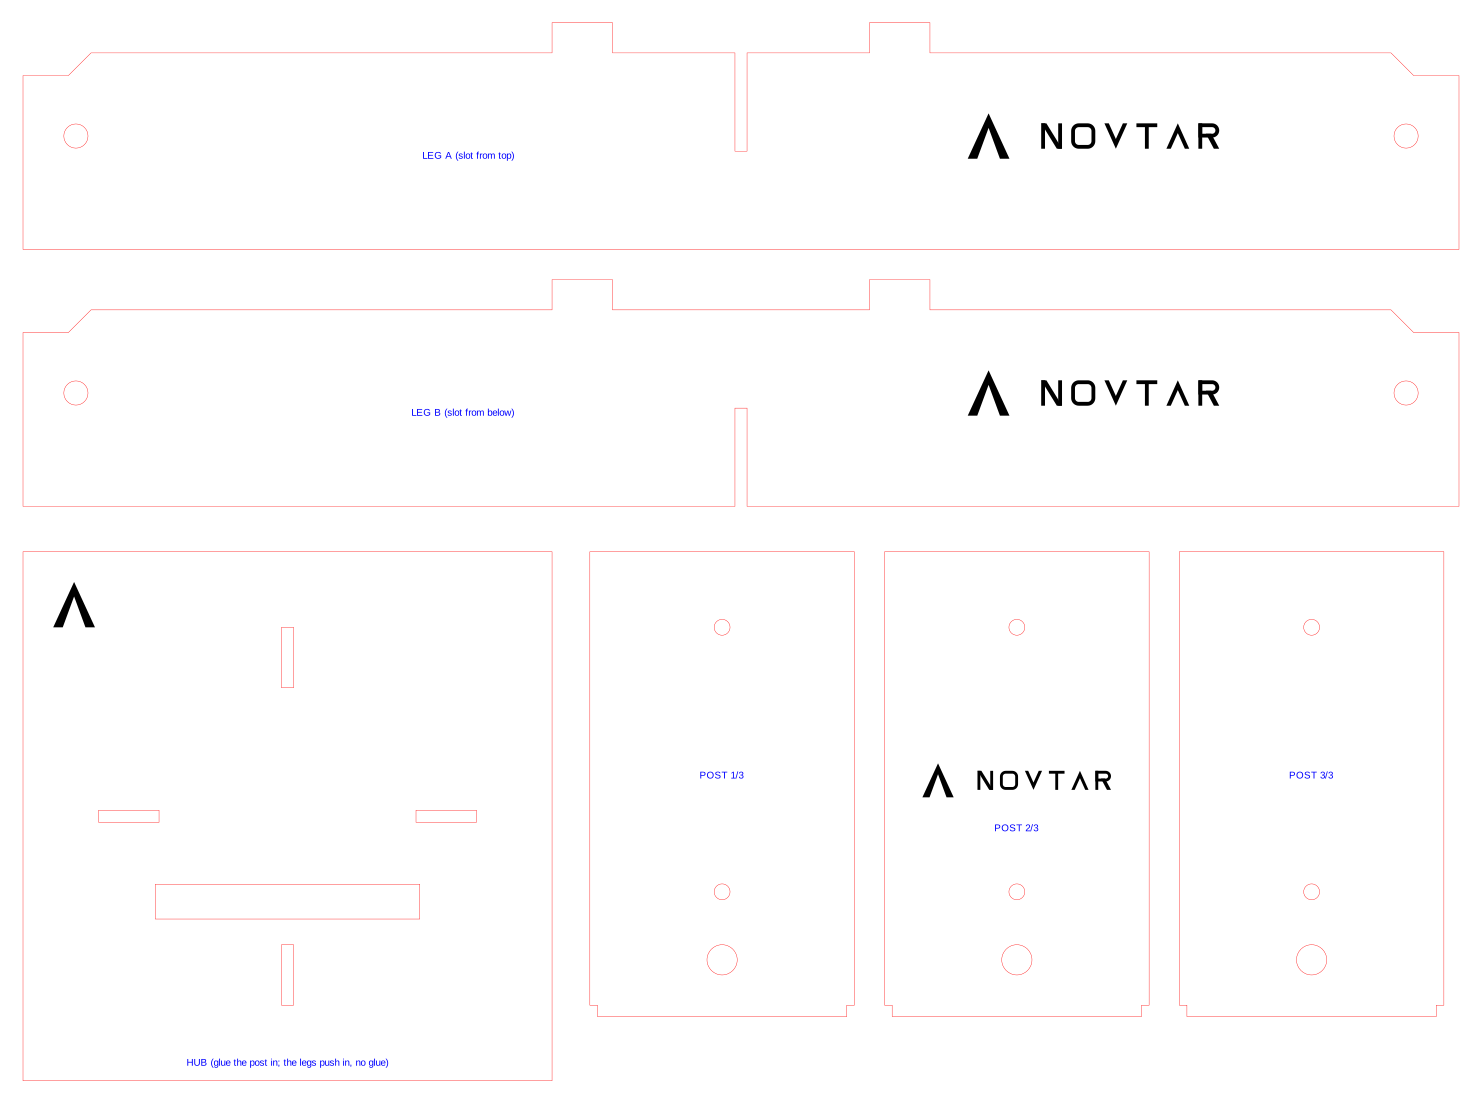
| 3 mm birch plywood, laser grade | 5 boards, at least 400 × 400 mm, plus 1 spare | Fins (392 mm tall sheet), fin can, payload core, launcher stand, and the fit test plus launcher parts on one board. |
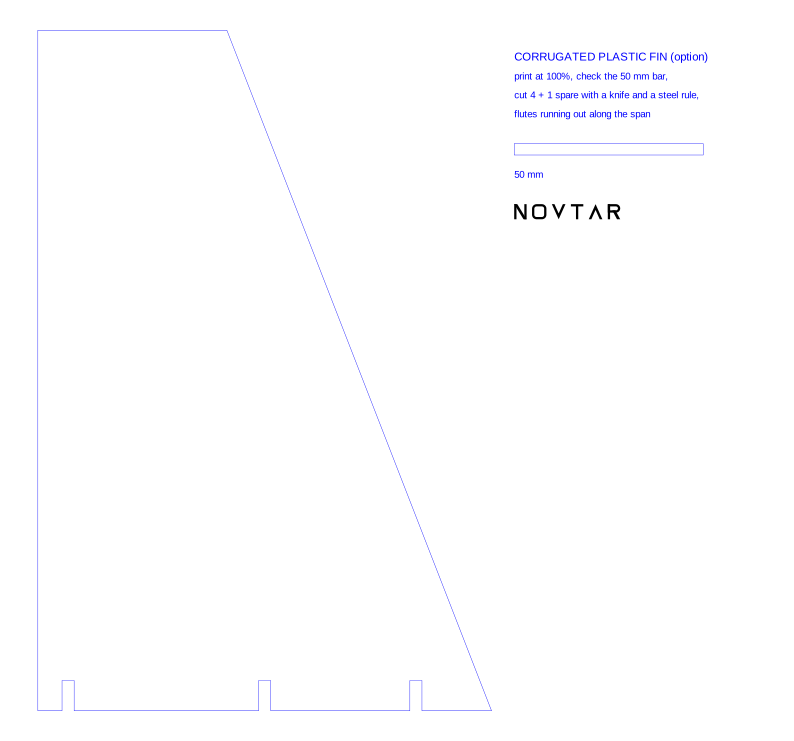
| Corrugated plastic sheet, 4 mm | 1 small sheet | Only if you choose the lighter fin option (section 05). |
| Modelling clay | about 220 g | Nose ballast. Weigh it in; the swing test decides the final amount. |
| Foam for the nose tip | a short offcut | Pipe insulation or a pool noodle. |
| Self-adhesive foam tape, about 1 mm | 1 roll | Lines the fin can rings so they grip the bottle without marking it. |
| Strapping (filament) tape and electrical tape | 1 roll each | Fin can, joint sleeve, hatch hinge. |
| Parachute about 83 cm, with a small swivel | 1 | Sized for 5 m/s on the estimated empty mass (drag coefficient 0.8 assumed, as N-1). A swivel stops the lines twisting. |
| Braided shock cord, about 1 m | 1 | Tied through the two holes in B3. |
| Wind-up toy timer (the kind water rocketeers call a "Tomy timer")[5] | 2 | One to fly, one spare. Any small wind-up timer with a release arm or a turning shaft works with the zip-tie slots on the spine. |
| Thin rubber bands, strong thread, a small split ring | a few | Hatch spring, latch line and the timer's pull-pin lanyard. |
| Wood glue, hot glue | Wood glue for ply to ply. Hot glue only inside the payload bottle (hatch frame strips), never on the pressure bottle. | |
| Clear satin varnish | a small tin | Seals the fins and fin can rings against wet grass. The engraved mark shows through. |
| Wordmark decal | NOVTAR wordmark, black vinyl decal on the payload bottle, 14 mm tall, about 98 mm long | Any sign or sticker shop can cut it from brand/wordmark-black.svg. On the payload bottle's straight part, opposite the hatch, reading from the tail towards the nose (bottom to top when it stands), the same way the engraved mark on the fins points. Never on the pressure bottle. |
| Small zip bag | 1 | Around the flight computer on the spine, with a pin hole so the barometer still reads the outside air. |
Flight computer
The same board and sensors as N-1 (see N-1's build book): Heltec WiFi LoRa 32 V3 (868 MHz), BMP280, MPU6050, 1S LiPo, active buzzer and switch, plus the ground station. W-1 flies first, so it uses the N-1 flight computer and moves it across once N-1 is ready. Buy a third Heltec only if both rockets need their own computer at the same time. The status LEDs (3 cut from a 5 V WS2812B-type strip, added 18 Nov 2026) come with the computer and mean the same as on N-1: see N-1's build book, section 06.
Launcher
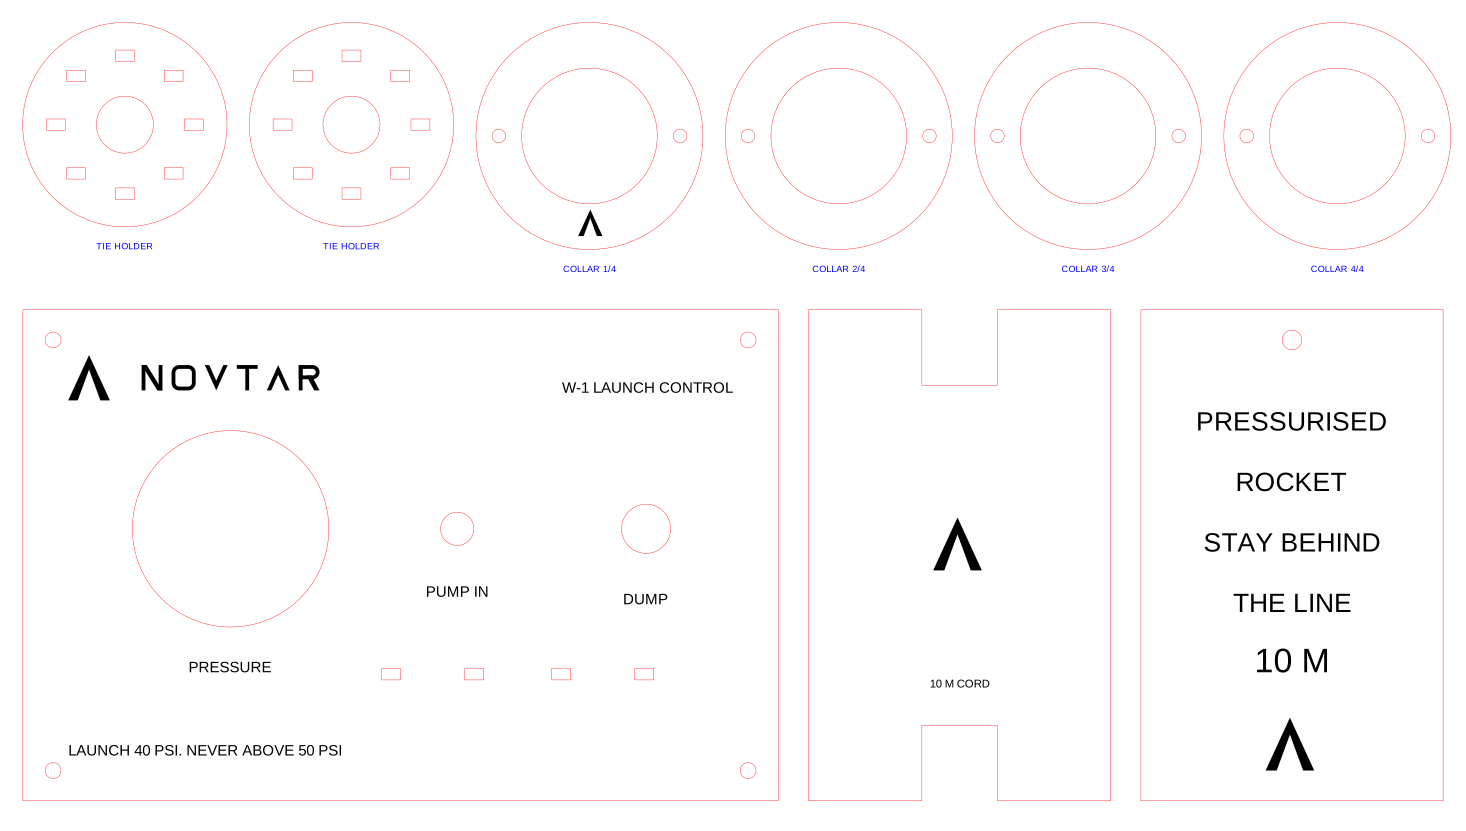
The launcher has its own page with its parts list, build and pressure safety: W-1 launcher.
Cut list and order
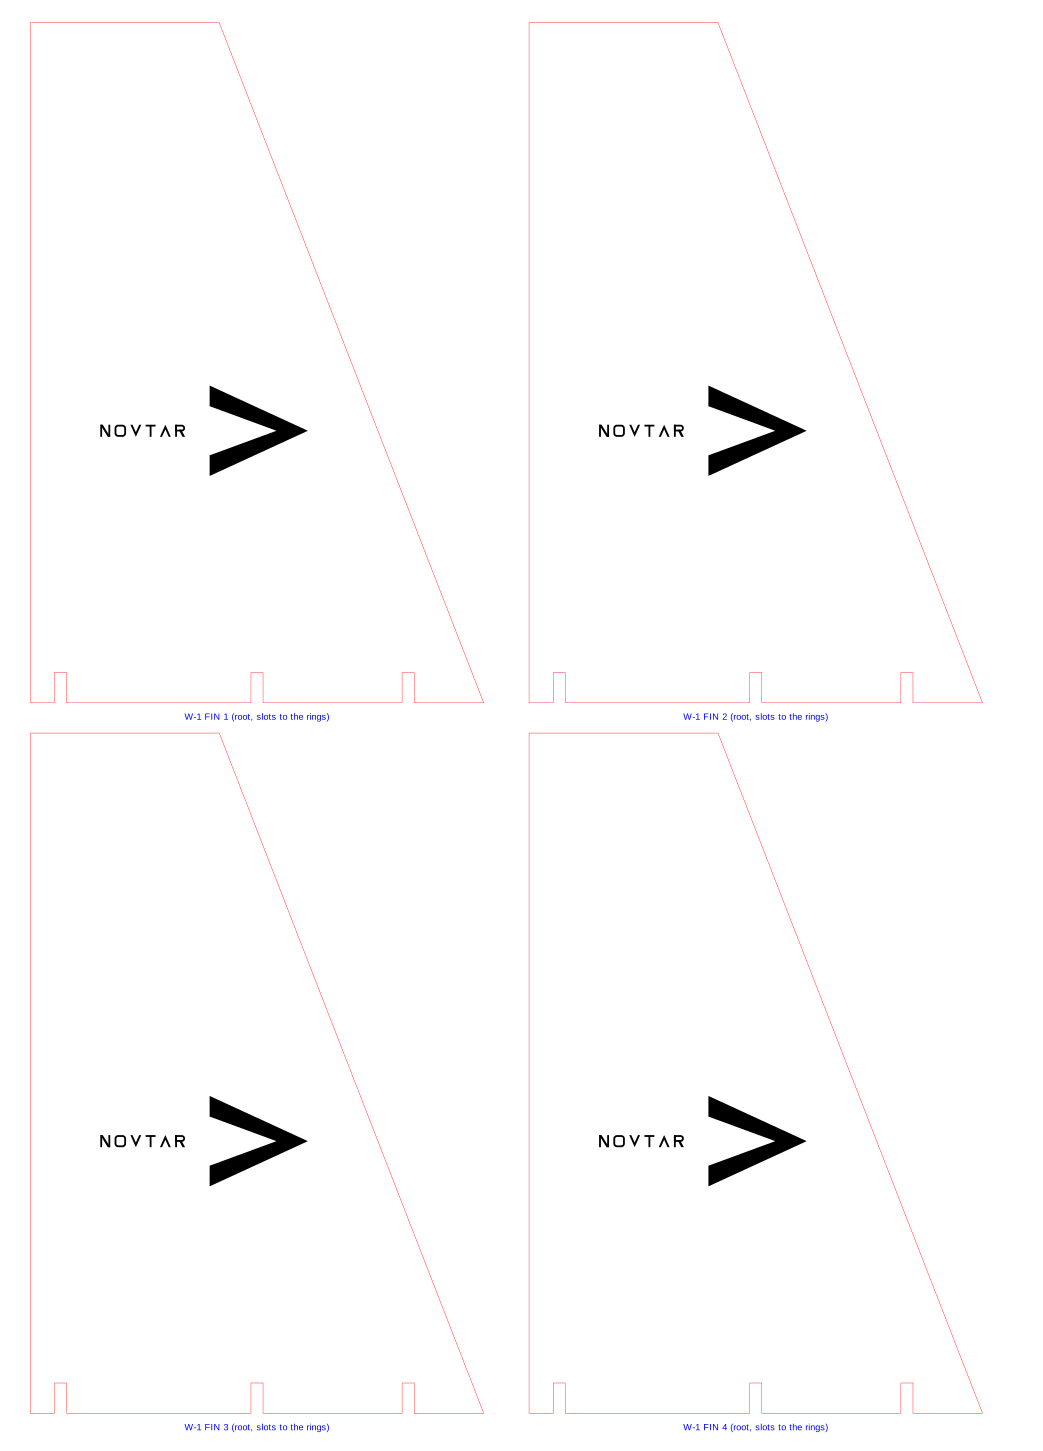
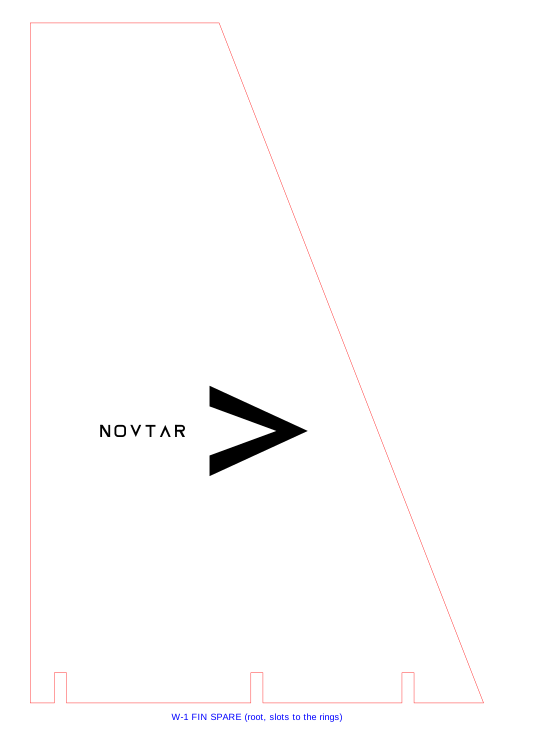
Fins: plywood or corrugated plastic?
| 3 mm plywood (default) | Corrugated plastic (option) | |
|---|---|---|
| Made with | The laser: exact, repeatable, slots fit first time | A knife and steel rule from the printed template. Not lasered: our laser rule is plywood, paper and card only |
| Mass | 118.7 g for 4 (est.) | Lighter (weigh a sample: we have no figure to quote) |
| Stiffness | Stiff, stays true | Flexes, can flutter at speed |
| Wet grass, hard landings | Needs sealing (paint or varnish); can split | Waterproof and bounces back |
| NOVTAR mark | Engraved | Sticker or paint |
We chose plywood: you own the laser, the fins and rings lock together exactly, and quality was the brief. Seal the fins well. If the first landings split them, cut the corrugated plastic set from the template; the slots are the same, so they drop into the same rings. Lighter fins move the CG forward, so stability gets better, not worse.
Order
- Material test and test card. If you have already run N-1's
00_material_test.ncand cut N-1's00_test_cardon this plywood, copy the kerf, ply thickness and slot play into W-1'sPARAMS. If not, do those first (N-1 build book, section 04). - Measure both bottles (section 06, step 1), put the numbers in
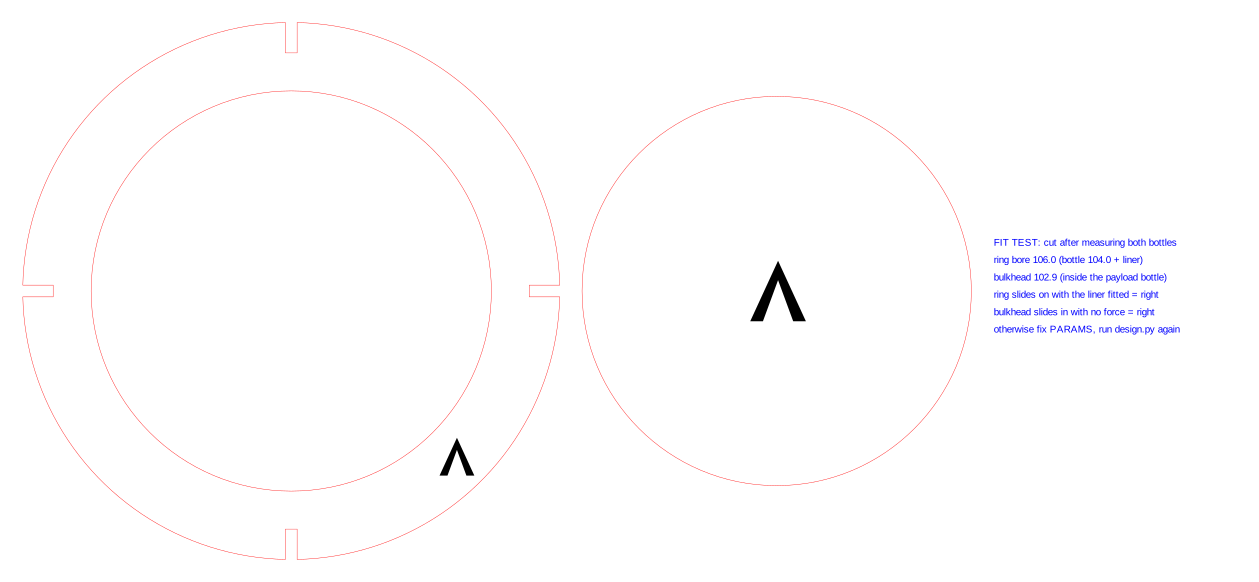
design.py, run it, then cut00_fit_test. The ring must slide over the pressure bottle with the foam liner on; the bulkhead must slide into the payload bottle with no force. - Board 1:
01_fins. Board 2:02_fin_can. Board 3:03_payload_core. - Board 4:
04_launcher_stand. Board 5:06_launcher_parts(the fit test can share this board). - Print
05_wrap_templateon A3 and05_fin_templateon A4 at 100%. Check the 50 mm bar with a ruler.
Each sheet has a ready G-code file in w1/out/lasergrbl/, made by N-1's tools/lasergrbl.py: engrave first, then cut pass by pass, smallest shapes first. The settings in it are the same
UNTESTED starting settings as N-1's until the material test is done. Same laser safety as N-1: glasses for the laser's wavelength, smoke vented outside, extinguisher in reach, never left running, plywood and paper only.
Step by step
- Measure the bottles. With calipers and a ruler on an empty, undamaged bottle: outside diameter, overall height, neck length to where the shoulder starts, shoulder length, base height, mouth inside diameter, and the shoulder's diameter 30 mm below where it starts (that's where the lower fin ring seats). Weigh one bottle. Put it all in
PARAMS, runpython design.py, thenpython tools/build_book.py. - Fit test. Cut
00_fit_test. Line the ring with the foam tape and try it on the pressure bottle; try the bulkhead in the payload bottle. Adjust and rerun until both are right. - Cut the payload bottle (never the pressure bottle). Mark it clearly with a P for payload. Cut off its base just where the straight part ends, with a sharp knife, and sand the edge smooth. Wrap the paper template round it with the top edge at B1's position and mark the hatch, vents, switch, USB and lanyard holes.
- Hatch. Cut the hatch window on three sides and leave the lower (tail-end) edge: tape that edge as the hinge. Glue the two hatch frame strips inside beside the window with hot glue, and the latch tab inside the door's top edge. A thin rubber band from the door to the frame pulls it open once it's released. Hinged at its lower edge, the door opens into the airflow, which pushes it further open.
- Fin can. Dry-fit the 4 fins into the three rings (half-lap slots). Check every fin is square, then glue with wood glue. Seal and paint the can. Stick the foam tape inside the upper and lower rings.
- Fit the fin can. Slide it onto the pressure bottle from the neck end until the lower ring seats on the shoulder. Tape over each ring's edge onto the bottle with strapping tape. No glue, no heat.
- Payload core. Push B1 onto the spine's top tab and B3 onto its bottom tab (wood glue). Slide B2 on sideways into its notch through its open slot and glue it. Tie the shock cord through B3's two holes.
- Flight computer. Mount the Heltec on M2.5 standoffs in the hole field, sensors and LiPo with zip ties, wired exactly as N-1 (N-1 build book, section 06), including the 3 status LEDs. Stick the LED strip on the spine's front face (the hatch side) beside the Heltec, along the edge away from the battery, below the engraved logo and ending just above B2: the payload bottle is clear, so no windows are needed, and the decal is on the other side. Antenna up through B1's hole. Put the sled in the zip bag with a pin hole near the barometer.
- Timer. Zip-tie the timer to the back of the spine in the parachute bay (use the timer plate if it needs packing out). The latch line runs from the door's latch tab through the hole in the spine to the timer's release. The timer's pull pin gets a short lanyard that leaves through the lanyard hole and ties to the launcher, so lift-off pulls the pin and starts the timer.
- Assemble. Slide the core into the payload bottle from the cut end until B1 stops in the shoulder; B3 ends up flush with the cut edge. When you sleeve and tape the two bottles together, turn them so the hatch sits halfway between two fins (45° from each), so the parachute comes out through the gap. Press the clay ballast into the neck and put the cap on. Tape on the foam tip. Join the payload bottle to the pressure bottle's base with a sleeve band (a strip cut from a spare bottle) taped round the joint.
- Weigh and check. Weigh the whole rocket empty, update the masses in
design.py, rerun it, then do the swing test (section 09).
Parachute: side hatch and a wind-up timer
No electronics are in the loop. A small wind-up timer starts when the rocket leaves the launcher and, when it runs down, lets go of the line that holds the hatch shut. The rubber band and the airflow open the door, and the door pulls the parachute out.
- Why this one. It's the approach most commonly described by water rocket builders: a wind-up toy timer whose output holds a door shut over the parachute, released at launch[5], and side deployment that keeps the nose rigid for electronics[6]. Our nose holds the ballast and sits right above the flight computer, so a nose that comes off is not an option. Builders also warn that parachute recovery is hard to make reliable every time, which is why the bench test below matters most.
- Timing. The aim is to open just after the thrust ends[5] and before the rocket falls fast: near the top. We can't predict that time (we haven't estimated the height). Start with the timer's shortest setting, film the first flights and adjust. The flight computer's log shows exactly when the hatch opened (the descent rate changes).
- Bench test before every flying day. "A timer that works the same way 10 times in a row is a parachute deployment system."[7] Pull the pin by hand 10 times and time each release with a phone. Any failure means don't fly until it's fixed.
- If it fails in flight, the rocket comes down hard. That is why the nose is soft foam, why everyone stays far back and watches the rocket all the way down, and why no-one tries to catch it.
Will N-1's firmware work on a water rocket?
Partly. It will power up, log, send telemetry and be found after landing. But its launch detection was written for a motor that burns for over a second, and a water rocket's push is far shorter.
These are the thresholds in n1/firmware/rocket/src/main.cpp today (read automatically by this script). N-1's firmware has not been changed for W-1.
| Setting | Value | On a water rocket |
|---|---|---|
| Sampling on the pad | 100 ms (10 a second) | Too slow to see the push. For a typical 2 litre water rocket the water is out in under 0.1 s, plus about 0.05 s for the remaining air[1]. That's one or two pad samples at most. |
| Launch by acceleration | over 2.5 g for 3 samples in a row | Likely to miss. 3 samples at 10 a second need about 300 ms of high g; the push lasts well under half of that[1]. |
| Accelerometer range | ±16 g | Water rockets often exceed 200 g during thrust[8]. The MPU6050 will read flat at its limit, so peak g isn't measured. Whether the sensor survives repeated shocks of that size is to check against its datasheet. |
| Launch by barometer | 20 m up while rising faster than 5 m/s | Unknown. It depends on W-1 getting well above 20 m (the smoothing makes the reading lag). If it doesn't, the board stays in PAD all flight: no 50 Hz log, no APOGEE, no LANDED. |
| Flight logging | 50 a second after launch | Only starts once launch is detected. Even at 50 Hz the push itself is a handful of samples; one water rocket experimenter says at least 1000 a second is needed to capture thrust[8]. |
| Apogee | 2 m below the peak | Fine for a low flight. |
| Knock, not a launch | back to PAD if under 3 m climb in 10 s | Fine. |
| Landing | still for 5 s | Fine. LANDED, the buzzer and LOCATE work as on N-1, if launch was detected. |
What still works without changes
Even if it never leaves PAD, the board keeps logging: on the pad it writes to flash 10 times a second whenever it's moving, and its peak altitude still updates. So the flight's height profile is recorded at 10 Hz, telemetry still reaches Mission Control, and you can still download the log. That already tests the board, the battery, the radio and the routine.
What to tune for W-1 (a separate decision, not done)
- Count a single sample over the g threshold as launch (or latch the high-g event), or sample the IMU faster on the pad while still writing to flash slowly.
- A lower barometric launch height, chosen from the first flights' real data, keeping the climb-rate check so a walk uphill still isn't a launch.
- Lighter barometer smoothing, because the whole flight is short.
- If peak g matters, a high-range accelerometer would be needed (to research). The ±16 g MPU6050 is fine for N-1.
- Do these as a W-1 build option in the firmware, so N-1's thresholds stay exactly as they are.
Measure only. The flight computer never opens the hatch or fires anything; there is no servo, no pyro and no deployment code. Protect the board from water: zip bag with a pin hole, and land on grass.
Tests
- Fit test passed: ring on the bottle, bulkhead in the payload bottle.
- Swing test (empty, as it flies after the water is gone): tie a string round the rocket at its balance point, swing it in a circle. It should fly nose first. If it wobbles or flies tail first, add clay in the nose and repeat. Note the balance point in
design.py. - Balance point with water: with a quarter of the water in (cap on, nothing pressurised), find the balance point and record it. It will be much further back.
- Timer bench test: 10 out of 10 releases, timed[7].
- Hatch test: with the rocket held horizontal, pull the pin, wait for the timer, and watch the door open and the parachute come out by itself. Repeat with the parachute packed as for flight.
- Flight computer bench tests from N-1's book (start-up beeps, stairs, shake, range, battery), done with the board in W-1's sled.
- Launcher tests: leak test and relief valve test, on the launcher page.
- Pull-cord drop test: on the launcher, pull the cord from the full distance and check the bottle releases cleanly, with no water and no pressure.
Launch day and safety
Pressure. Launch at 40 psi (2.76 bar) for the first flights. Never above 50 psi (3.45 bar). NASA Glenn says to pump a bottle rocket to no more than about 50 psi[3], and a school district's job hazard analysis sets 50 psi as its maximum[4]. Other sources allow more; we take the cautious figure.
Distance. Everyone, including whoever pumps and pulls, stays at least 10 m from the launcher while it is pressurised and at launch: the hose and pull cord are 10 m long. That is more than the school analysis's 30 ft (about 9 m) for observers[4] and the safety code's 20 ft for people without eye protection[9]. Anyone not involved stays at least 50 ft (about 15 m) away[4].
Eye protection for everyone: impact-resistant safety glasses (ordinary glasses aren't enough)[4].
Never stand over the rocket or put anything above it while it's on the launcher[3][4].
The field
- A big open grass field with the landowner's permission, away from people, roads, buildings, trees and power lines. As a minimum, at least 50 ft (about 15 m) from buildings, utility lines, trees and roads[4]; in practice choose somewhere far bigger, because the parachute drifts.
- Calm, clear weather, above freezing[4]. If there is some wind, set the launcher on the upwind side so the rocket drifts back over the field[3]. For the first flights, calm days only.
- An adult present the whole time. NASA's guidance stresses close supervision[3].
The law (UK)
- The Air Navigation Order 2016, article 96, covers small rockets whose motors' total impulse is over 160 newton-seconds, and large rockets[10]. It doesn't mention water rockets, and we haven't worked out a water rocket's total impulse. Whether it applies to W-1: to check.
- The CAA's page on smaller rockets says rockets with up to 160 Ns don't need CAA permission, but also says its notification process includes small and model rockets, with 28 days' notice[11]. That's unclear for a water rocket. To check: ask the CAA through the contact on that page before the first launch, and keep the reply.
- Not near an airfield or in controlled airspace (article 96 has extra conditions there[10]). To check for the chosen field on an airspace map.
- Public parks can have their own bylaws. To check with the council if the field is public land.
Bottles
- Plastic drink bottles only, new where possible[3]; and for W-1, fizzy-drink bottles only. Inspect every time for cracks, dents and discolouring[4].
- Retire a pressure bottle after 10 launches, or sooner if you suspect damage[4] (NASA says 10 to 15[3]; we take 10). Keep a tally on the bottle in marker.
- We found no published burst rating for a 2 litre bottle that we could rely on, so W-1 stays at the educational limit above.
- The school analysis also says not to attach hard objects to the bottle[4]. That's for a class launching bare bottles; W-1 carries fins and a payload. We reduce the risk with the soft nose, the tape-only fin can, the distances above, and by never flying without a passed timer test.
The launch, step by step
- Set out the launcher, peg it down, and lay the hose and pull cord out 10 m to the operator's spot. Put the range sign and the line out.
- Flight computer on: three beeps, Mission Control shows PAD and GO (N-1 launch kit routine).
- Fill a quarter of the bottle with clean water (about 500 ml; the MCPS analysis uses about a third[4], W-1 uses less to stay stable), fit it on the launcher, check the cable ties hold the neck ring, tie the timer lanyard to the launcher, and wind and pin the timer.
- Everyone walks back behind the line. Check the field and sky are clear.
- Pump to 40 psi, watching the gauge. If anyone comes inside the line, stop[4].
- Count down out loud[9], then a quick, gentle pull on the cord[4].
- Watch the rocket all the way down and call out if it drifts towards anyone[4]. Don't catch it.
- If it doesn't go: don't approach. Open the dump valve at the control panel and wait until the gauge reads zero. Nobody goes near a launcher that might still be pressurised[9].
- After landing: wait for LANDED, then switch off and download the flight. Add one to the bottle's tally.
What comes next
- First flights at 40 psi to prove the hatch timer, the flight computer and the routine. Then real numbers: height, descent rate, flight time.
- Tune the launch detection for water rockets as a separate firmware option, from the real data, leaving N-1's settings alone.
- Then N-1, with a flight computer that has already flown.
Sources
Read on 17 November 2026. Where sources disagree, the page says so and takes the more cautious figure.
- [1] Dean Wheeler, BYU, How high did it go? (water rocket flight). https://www.et.byu.edu/~wheeler/benchtop/flight.php
- [2] Deben District Scouts, Water rockets risk assessment (2025). https://deben.suffolkscouts.org.uk/wp-content/uploads/2025/04/Deben-District-Camp-2025-Water-Rockets-Risk-Assessment.pdf
- [3] NASA Glenn Research Center, Bottle rocket safety. https://www.grc.nasa.gov/WWW/k-12/VirtualAero/BottleRocket/safety.htm
- [4] Montgomery County Public Schools, Job Hazard Analysis: Water Rocket Launch (2016). https://www.montgomeryschoolsmd.org/uploadedFiles/departments/facilities/safety/JHA%20-%20Science%20-%20Water%20Rocket%20061016%20FINAL.pdf
- [5] Hackaday (2021), Building a water rocket that lands via parachute. https://hackaday.com/2021/10/25/building-a-water-rocket-that-lands-via-parachute
- [6] Air Command Water Rockets (2011), side deployment parachute mechanism. https://aircommand.blogspot.com/2011/09/side-deployment-parachute-mechanism.html
- [7] MakerLab Kids, Paper clip descent timer (bench testing a timer). https://makerlabkids.pages.dev/programs/compressed-air-rockets/timer/
- [8] Dean Wheeler, BYU, What is a thrust curve?. https://www.et.byu.edu/~wheeler/benchtop/thrustcurve.php
- [9] American Water Rocket Safety Code, revision J (2002), as hosted by Jacob's Rocketry. https://waterrocketmanual.jacobsrocketry.com/safety_code.htm
- [10] Air Navigation Order 2016, article 96 (small and large rockets). https://www.legislation.gov.uk/uksi/2016/765/article/96
- [11] Civil Aviation Authority, Notifications for smaller rockets. https://www.caa.co.uk/space/licences-and-permissions/large-rocket-permission/notifications-for-smaller-rockets/